Vibration plate maintenance is the foundation for keeping your vibration plate safe, clean, and reliable. A vibration plate that gets regular upkeep (cleaning, inspections, and correct storage) performs better and endures longer.

About the author: Hello! I’m Vladimir Stanar, professor of physical education, kinesiotherapist, marathon runner, cyclist, and cycling coach, and long-time advocate of health, fitness, and active living.
My journey with vibration plates runs parallel to my professional career in education, sports medicine, and athletic development. Over time, I’ve come to see vibration plates as one of the most versatile tools for enhancing health, recovery, and performance.
✅ Expert-Reviewed by: Vanja Vukas, MPhEd
📚 Expert Contributor: Milutin Tucakov, MPhEd
From personal experience, even wiping the surface after each session prevents sticky residue buildup. Without consistent care, dust, loose parts, or neglected electronics can lead to breakdowns. In this article, I share detailed guidance on vibration plate maintenance, from daily cleaning to troubleshooting major issues.
Vibration Plate Maintenance Basics
Routine vibration plate maintenance covers key areas: cleaning and hygiene, fittings and hardware, electronics and parts, and usage and safety checks. These tasks are simple yet vital. In my early use, I skipped regular checks of bolts and cables, which led to rattling and display faults. After that, I established a schedule.
If you are thinking of replacing or upgrading your vibration plate, our comparison of models may help you pick one built for durability, such as those in best vibration plate.
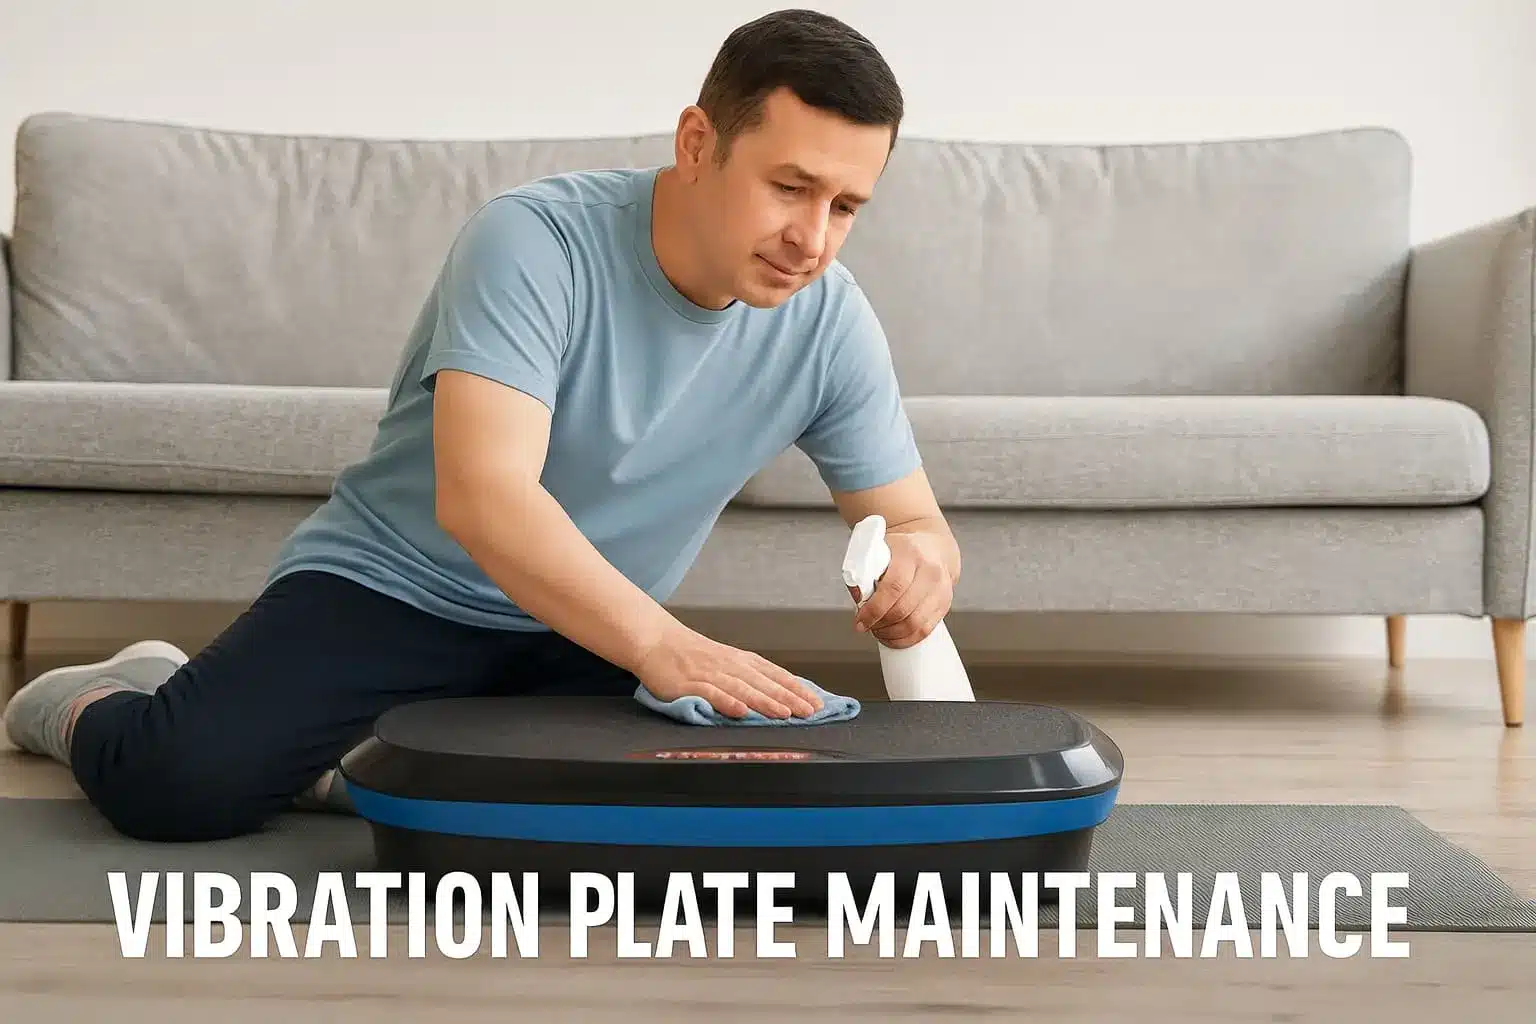
Cleaning & Hygiene: Step-By-Step Routine That Prevents Problems
Daily wipe in 60 seconds
- Unplug the vibration plate.
- Wipe the platform and handles with a barely damp microfiber cloth (mild soap in water).
- Dry with a second cloth. Moisture left on seams attracts dust.
- Quick glance for crumbs, pet hair, or grit around the feet. I use a small handheld vacuum once a week.
Screen, panel, and buttons
Use a microfiber cloth slightly dampened with water. Never spray directly on the display or button panel. If sweat dries on the edge of the screen, a cotton swab barely moistened with water loosens it. Dry the edge right away.
Disinfecting without damage
I keep a small bottle of diluted, alcohol-light disinfectant. I spray the cloth, not the vibration plate. I wipe contact areas, then dry. This prevents streaks on glossy panels.
Best time to clean
Clean right after your session. Sweat salts and dust harden if you wait. I put my cloth on the platform as a reminder, so I never step off without seeing it.
For readers tuning their routine with circulation in mind, compare features in best vibration plate for lymphatic drainage.
Fittings & Hardware: Stop Rattles and Keep It Stable

Weekly stability check
Place both hands on opposite corners of the platform and gently rock it. If you feel play, check:
• Feet: confirm they all touch the floor. Adjust threaded feet until level.
• Legs or columns: tighten accessible fasteners.
• Handrail: test for wiggle; snug the bolts/knob
Models like MERACH V44 Vibration Plate With Handrail need special attention if you're constantly using the handrail..
Screw tightening pattern
I tighten in a crisscross pattern, a little at a time. That evens pressure across the platform. If your plate has a removable plastic top cover that chatters, thin felt tape under the contact lip can quiet it. I have used 1 mm automotive felt around rattling plastic trims with good results.
Keep fasteners honest
Vibration works screws loose; that is normal. I do a five-minute bolt pass every other week. If a screw repeatedly loosens, add a drop of removable thread locker or a star washer, then recheck in a week.
Strength and bone support are often tied to firm footing and stable stance. See the spec angles and stance room discussed in best vibration plate for osteoporosis.
Electronics & Parts: Quick Checks Before You Assume a Failure
Power path checklist
• Outlet: test with a lamp to confirm power.
• Cord: inspect for kinks or crushed spots; replace if you see copper or cracked insulation.
• Plug seating: push straight and firm until fully seated.
• Power switch: cycle off, wait 60 seconds, then on. A short power rest often clears minor logic faults.
• If the display is blank, check the outlet’s breaker or fuse. Some plates also have a small fuse in the inlet or internal bay; consult your manual before opening anything.
Display or buttons unresponsive
Unplug the plate and wait a full minute. Reconnect the display harness if accessible on your model, pressing connectors straight in. I have fixed an intermittent start button by reseating a ribbon cable that had crept out by a millimeter.
Motor care and heat
Give the motor cool-down time between long sessions. Heat buildup ages bearings and insulation. I keep sessions within the manufacturer’s time guidance and leave a few minutes between programs. If the plate smells hot, squeals, or slows under load, stop and let it cool. Check vents for dust and clear them with a hand vac from the outside only.
If weight-management programming is your focus and you want steady, reliable duty cycles, compare options in best vibration plates for weight loss.
Usage & Safety Checks: The 30-Second Pre-Use Walkaround

I run through this quick list before stepping on:
• Level check: the plate does not rock on the floor.
• Cable path: no tension on the plug; no trip hazard.
• Handles: hand-tight; no wiggle. (This applies to models with handles)
• Screen and panel: dry and clean.
• Sound: no scraping when it starts. If I hear a rattle, I stop and recheck bolts.
For users managing nerve sensitivity, foot comfort and vibration patterns matter; see best vibration plate for neuropathy for feature talk-throughs you can apply during your safety checks.
Troubleshooting: From “Weird Noise” to “Back To Normal”
New rattle after a move
Likely cause: a slightly loose top-plate fastener or handle bolt.
Fix: unplug; remove cosmetic covers if the manual allows; tighten platform and handle fasteners in a crisscross pattern. If a thin plastic lid buzzes at certain frequencies, a narrow strip of felt under the lip can silence it. I mark tightened screws with a tiny dot of painter’s tape so I can spot the ones I adjusted later.
Thump on one side under load
Likely cause: plate not level, a foot retracted, or a floor dip.
Fix: place a bubble level on the platform; adjust feet until the bubble centers. If your floor has a sag, shim under the lowest foot with a dense rubber pad.
High-pitched chirp at certain speeds
Likely cause: metal-to-metal contact at a bracket or cable clip.
Fix: add a nylon washer or slightly reposition a cable so it does not touch the housing. I use a small piece of self-fusing silicone tape to cushion contacts where a clip cannot be adjusted.
Display lights up but vibration stops mid-session
Likely cause: overheat protection or a loose motor connector.
Fix: power off; let it cool for 10 minutes; check vents for dust; reseat accessible motor connectors. Resume with a shorter program and extra cool-down.
Screen flicker only when the room is hot
Likely cause: connector creep or borderline power at the outlet.
Fix: reseat display ribbon; try a different outlet on a separate circuit; avoid daisy-chained power strips. I had a summer flicker that vanished after I moved to a dedicated outlet.
If you want to see how a compact platform routes controls and motors in a tight chassis, skim the points we note in Power Plate Move review.
Replacement Parts and When To Call Support
• Power cords: replace if you see fraying or if the plug feels loose in the inlet.
• Feet and pads: swap when rubber hardens or cracks; worn feet increase noise.
• Mounting hardware: replace stripped screws; do not oversize unless the manual allows.
• Electronics: if smell, scorch marks, or repeated shutdowns persist, stop using the plate and contact support.
I keep a simple log: date, noise noted, screws tightened, and any parts replaced. It takes 30 seconds and helps if you need warranty service.
If you like reading how individual plates age in daily use, compare notes in Lifepro Rhythm review.
Storage That Protects Your Vibration Plate

• Location: dry, cool room away from direct sun. I keep mine under the bed.
• Cover: breathable cloth; avoid plastic that traps moisture.
• Cord: remove tension from the plug; coil loosely with a Velcro tie.
• Floor: use a firm mat to keep grit away from feet.
• Long breaks: clean thoroughly, then leave a silica gel packet under the cover to absorb moisture.
My Maintenance Schedule You Can Copy Today
I time these with a phone reminder. It takes less than ten minutes a week.
After every session
• Wipe platform and handles; dry.
• Cable check: no strain on the plug.
• 30-second sound check on start and stop.
Weekly
• Tighten platform and handle screws in a crisscross pattern.
• Verify level; adjust feet.
• Vacuum around feet and vents; lightly dust external vents only.
• Quick log entry.
Monthly
• Pull the plug; wait one minute; reseat accessible connectors straight in.
• Inspect cord and plug for kinks, heat discoloration, or cracked strain relief.
• Confirm the room has airflow; clear anything blocking vents.
• Replace any foot pads that feel stiff or glazed.
Every 6 to 12 months
• Replace worn feet; check all fasteners.
• If you notice persistent shutdowns, squeals, or heat odors, contact support before further use.
Pro Tips From Daily Use
• Keep a tiny headlamp near your vibration plate. Screws hide under shadows.
• Label recurring problem screws with a small dot of tape. If one keeps backing out, use a star washer or removable thread locker.
• If a trim piece buzzes at one frequency only, it is likely a harmonic. Seating foam or felt at that contact point usually cures it.
• Treat the cord like a component. I keep slack so the plug never tugs when I step on or off.
• If the room runs hot in summer, shorten sessions or add a fan for the room. Heat soak increases shutdown complaints.
• Record little wins. The first time I silenced a resonance with a 5 cm felt strip, I wrote down the spot. Six months later, when the buzz returned, I fixed it in two minutes.
If you want a sturdier platform or controls that are friendly for frequent use, read impressions in both Lifepro rumblex review and Merach vibration plate review.
Buying With Maintenance in Mind
When I shop, I look for:
• Accessible fasteners: visible screws are easy to tighten.
• Platform edges that seat firmly: fewer plastic lips that rattle.
• Good cord strain relief and a solid inlet.
• Passive airflow paths that are not easily blocked by walls or curtains.
• Feet with usable adjustment range.
• Clear manuals with exploded diagrams and part numbers.
If durability is at the top of your list, start with best vibration plate and see which models match your maintenance preferences.
Keep Your Vibration Plate Ready Every Day
A consistent maintenance habit protects performance, reduces noise, and extends life. Start with the quick daily wipe and the 30-second pre-use walkaround. Add the weekly bolt pass and the monthly connector check.
FAQs
How do I clean my vibration plate?
To clean your vibration plate, you should unplug it, wipe the platform and handles with a soft damp cloth and mild soap, and dry with a second cloth. If sweat has dried at the screen edge, you can loosen it with a slightly damp cotton swab and then dry the seam.
How often should I service my vibration plate?
You should service your vibration plate about once a year; heavy use may need checks sooner. Weekly bolt passes and monthly connector reseats will keep formal servicing simple.
Can I use disinfectant wipes on my vibration plate?
Yes, you can use disinfectant wipes on your vibration plate if you avoid direct contact with the display, buttons, and motor area. You should spray the cloth, not the plate, and always dry glossy panels to prevent streaks.
How do I fix a vibration plate that makes noise?
To fix a vibration plate that makes noise, you should tighten platform and handle screws, confirm the feet all touch the floor, and test again. If a plastic lid buzzes at a single speed, you can add a thin felt strip under the contact edge.
What is the best way to store a vibration plate?
The best way to store a vibration plate is in a dry, cool room with a breathable cover and no weight stacked on it. You should coil the cord with a Velcro tie, leave a little slack at the plug, and vacuum around the feet so grit does not grind into pads.